You have completed a production run of 5,000 rigid gift boxes for a premium wine client. During final quality inspection, your team flags 200 boxes for visible corner wrinkles. Another 150 show slight cover warping. Thirty boxes have delaminated edges. The client accepts the shipment with a discount—but asks pointed questions about your process control.
This scenario plays out in packaging facilities worldwide. Rigid box defects, even at low percentages, erode margins, damage client confidence, and consume supervisor time for root cause analysis. The most frustrating part? Many defects trace back to preventable causes that become baked into production processes over time.
This guide systematically examines the most common rigid box quality issues—warping, corner wrinkles, delamination, misalignment, surface bubbling, and dimensional inconsistency. For each defect, we explain the physical mechanisms, traceable root causes, and practical prevention measures that production teams can implement without major capital investment.
According to ISO 15396:2022 (the international standard for packaging quality management systems), documented defect classification and root cause analysis form mandatory elements of certified quality control processes. Understanding these defect categories, therefore, supports both operational improvement and regulatory compliance.
Warping occurs when a rigid box cover or base does not remain flat after production. The board bends upward (positive warp) or downward (negative warp) along the grain or across it. Beyond cosmetic concerns, warped boxes do not close properly, create poor stacking stability, and appear visibly lower in quality to end consumers.
Moisture imbalance is the primary cause. Paper-based materials expand when absorbing moisture and contract when drying. When one side of a board or laminated structure experiences different moisture exposure than the opposite side, differential expansion creates internal stress that manifests as warping.
Specific contributors include:
Uneven glue application: Wet glue adds moisture to the paper side. If the opposite board side remains dry, the moisture gradient causes bending toward the dry side.
Inconsistent drying conditions: Boxes stacked immediately after production trap moisture, preventing uniform evaporation. Boxes on the outside of stacks dry faster than interior boxes, creating batch inconsistency.
Board storage environment: Cardboard stored in humid conditions absorbs ambient moisture before processing. Subsequent drying during production creates unpredictable movement.
Fiber orientation mismatch is a second major cause. Paperboard has a grain direction (the orientation of fibers from the papermaking process). Bending stiffness differs along versus across the grain. When cover material grain runs perpendicular to board grain, temperature and humidity changes produce differential movement and warping.
Measure and control glue consumption: Track glue weight per box. Sudden increases indicate over-application. Modern application systems with viscosity control maintain consistent coating weight regardless of ambient conditions.
Implement staged drying: Allow boxes to rest on open racks for 4–6 hours before stacking, permitting controlled moisture equalization. For high-volume production, forced air drying tunnels accelerate this process consistently.
Storage discipline: Condition incoming board in your production environment for 48–72 hours before use. Maintain storage humidity between 45–55% RH (relative humidity) and temperature at 20–24°C (68–75°F).
Verify grain direction: Specify grain direction on your material purchasing requirements. For rigid box covers, board grain and cover paper grain should run parallel, not perpendicular.
External reference: Research published in the Journal of Pulp and Paper Science (Vol. 48, 2023) demonstrates that moisture content variation of just 3 percentage points across a paperboard sheet can generate warp deflection exceeding 15mm over a 300mm span—sufficient to make a rigid box visibly unflat and functionally problematic for automated filling lines.
Corner wrinkles appear as small folds or creases at the folded edges of wrapped rigid boxes. They occur when excess cover material has nowhere to go during folding, causing the paper to buckle rather than lie flat against the board.
Material thickness mismatch: Thicker cover papers or specialty materials (textured stocks, metallized films) have lower stretch capacity. When folded around a sharp board corner, the outer paper surface must travel farther than the inner surface. Materials without sufficient elasticity or elongation wrinkle.
Insufficient scoring or creasing: Cover paper requires pre-scoring (a compressed line that creates a hinge) at fold points. Missing or shallow scores force the paper to fold unpredictably, concentrating stress at the wrong locations.
Excess adhesive softening: Some water-based glues temporarily soften paper fibers. If the cover material becomes oversaturated, its structural strength decreases, and controlled folding becomes impossible. The softened paper tears or bunches rather than bending cleanly.
Incorrect folding sequence or pressure: The order of folding operations matters. Wrapping the long side first, then the short side, creates different material distribution than the reverse sequence. Similarly, folding pressure too low fails to eliminate material slack; pressure too high compresses board edges permanently.
Match cover material to box complexity: High-stretch vinyl or coated papers handle tight radius corners better than rigid or heavily textured stocks. For luxury cosmetic boxes with sharp 90° edges, consider pre-breaking (a preliminary crease) before final folding.
Verify scoring specifications: Test score depth using a simple fold test—the scored line should fold 180° without cracking or visible whitening. Adjust scoring rules (male/female die combinations) for each material batch.
Control glue viscosity and application: Maintain adhesive within manufacturer-recommended viscosity range. Overly thin glue penetrates deeper into paper, causing unwanted softening. Automated viscosity control systems prevent this drift.
Establish folding parameter baselines: Document pressure, timing, and sequence settings for each box style. Train operators to verify first-article quality before running full batches.
Delamination appears as separation between the cover material and the underlying board, typically at edges or corners. The defect ranges from minor edge lifting (1–2mm of separation) to complete detachment of entire panels.
Insufficient adhesive coverage or drying: Dry spots on the board receive no adhesive, creating unbonded zones that eventually lift. Alternatively, adhesive that has not fully set before stacking—especially cold glue formulations—allows the cover material to shift or separate under stack pressure.
Board contamination: Dust, oil from handling, or release agents from previous processing steps create low-surface-energy zones where adhesive cannot bond. These contamination spots act as initiation points for progressive delamination.
Environmental stress during curing: Adhesives require specific temperature and humidity ranges to achieve full bond strength. Low temperatures slow or halt curing; very dry conditions cause rapid surface drying that traps moisture below, creating weak boundary layers.
Material incompatibility: Some cover papers contain silicone, wax, or other low-surface-energy coatings that resist bonding. Without specifically formulated adhesives or surface treatment (corona or plasma treatment), delamination is guaranteed.
Implement adhesive coverage verification: Use visual inspection under good lighting or automated optical inspection to confirm complete coverage. Fluorescent additives that glow under UV light allow rapid manual checks.
Respect drying time requirements: Do not stack boxes immediately after production unless drying tunnels or heated stacking sections ensure adequate bond development. For cold glue systems, 6–12 hours of flat drying before stacking is typical.
Wipe or vacuum board surfaces: Simple brushed roller or vacuum dust removal systems dramatically reduce contamination-related delamination. For high-value production, static eliminators prevent dust attraction before gluing.
Test adhesive compatibility: Perform simple peel tests (manual separation 30 minutes after bonding) when introducing new material combinations. Document which adhesives work with which cover stocks.
External reference: The Technical Association of the Pulp and Paper Industry (TAPPI) standard TIP 0304-63 specifically addresses adhesive bond strength testing for paperboard laminations. The standard notes that minimum peel resistance for rigid packaging applications should exceed 2.5 N/cm (approximately 1.4 pounds-force per inch) to withstand downstream converting and filling operations.
Misalignment occurs when cover material shifts relative to the board during positioning, folding, or pressing. The result is uneven margins, exposed board edges on one side, or cover pattern wrapping inconsistently around the box.
Feeder or positioning system variation: Inconsistent paper feeding leads to variable starting positions. If the cover sheet enters the register station at different angles or positions cycle to cycle, downstream folding inherits those errors.
Mechanical wear or backlash: Loose belts, worn drive components, or excessive bearing clearance create free play in the motion system. The machine positions differently on approach from different directions (hysteresis), causing position inconsistency.
Board dimensional variation: If incoming board blank sizes vary beyond specification, the same machine setup produces different wrap margins. A board 1mm narrower than nominal leaves 0.5mm extra cover material on each side—visible as shifted appearance.
Operator setup error: Incorrect registration guide settings, improperly loaded materials, or forgotten adjustments to panel size parameters produce systematic misalignment across entire batches.
Establish registration verification procedures: Check alignment at start of shift, after any material change, and hourly during production. A transparent overlay with registration marks allows rapid visual confirmation.
Implement preventive maintenance schedules: Replace feeder belts annually or based on cycle count. Document guide wear measurements. Calibrate positioning sensors quarterly using certified test fixtures.
Enforce incoming board inspection: Sample and measure board blanks against specification. Reject shipments with dimensional variation exceeding ±0.5mm for precision wrapping applications.
Use machine-stored recipes with checklists: Require operators to verify that recalled recipe settings match the physical setup (guides, pressure, timing) before production. A simple laminated checklist reduces setup errors.
Different product categories tolerate different levels of registration variation. To understand how alignment requirements vary between high-volume consumer electronics packaging and luxury & cosmetics packaging, explore the luxury packaging making machine.
Bubbles appear as raised areas on the cover surface, ranging from small pinholes to large blister spots several centimeters across. They are trapped air or vapor between the cover material and the board.
Trapped air during lamination: When cover material contacts board, air can become trapped if the laminating roller does not apply progressive, linear pressure from the center outward. Air pockets compress during pressing but reappear during storage or temperature changes.
Excess moisture vaporizing: Water-based adhesives release moisture as they dry. If the cover material has low vapor permeability (metallized films, heavily coated papers), vapor cannot escape and collects as bubbles beneath the surface.
Inconsistent pressing conditions: Uneven pressure distribution across the pressing platen or roller creates zones of incomplete contact, where bubbles form and persist.
Optimize laminating roller configuration: Use rollers that apply pressure from the center outward, or angled rollers that progressively squeeze air toward the edges. Roller durometer (hardness) matters—softer rollers conform better to uneven surfaces.
Use vapor-permeable cover materials where possible: For applications requiring non-permeable films, consider pin-perforating the material (microscopic holes invisible to the eye) to allow vapor escape.
Apply pressure gradually: Immediate full pressure traps air. Gradual pressure build-up (ramping) allows air to evacuate before final bonding.
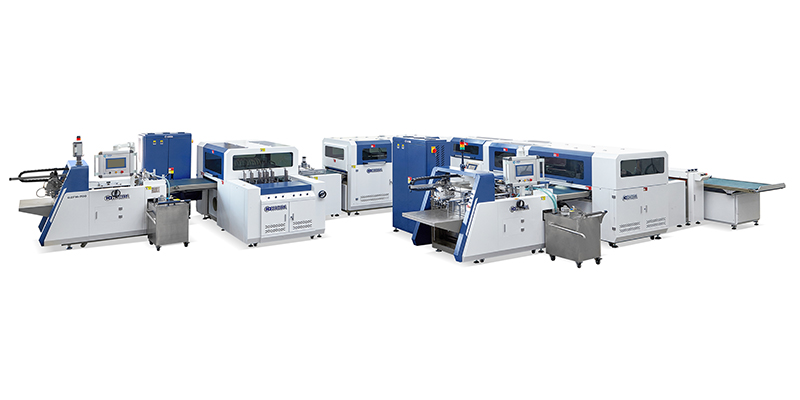
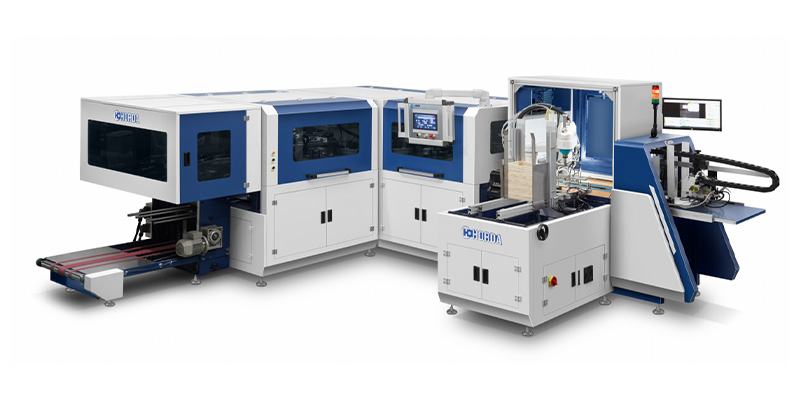
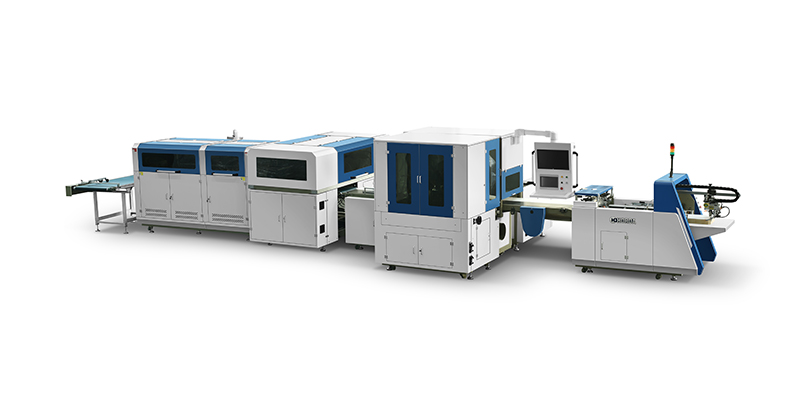
Understanding how different gluing and pressing mechanisms handle material variability is essential for consistent quality. The technical design of modern rigid box making machine equipment includes specific features to minimize bubbling and delamination risks.
Finished boxes that should be identical measure differently. Some are slightly taller, wider, or out of square. Inconsistent boxes create assembly problems, poor closure fit, and rejection from automated filling lines.
Board blank cutting variation: Each box starts with a board blank. If blanks vary, finished boxes vary. Causes include dull cutting dies, loose cutting tolerances, or board expansion from humidity changes between cutting and wrapping.
Folding pressure inconsistency: Boxes folded with more pressure end up slightly smaller (board is compressed), while those with less pressure remain larger. Variation in pressure across a batch produces dimension spread.
Corner forming differences: The amount of material allowed to wrap around corners affects overall dimensions. If corner tucking or folding varies, the effective finished size varies.
Tighten incoming board specifications: Work with suppliers to reduce cutting tolerance from ±1mm to ±0.5mm or better. For critical applications, consider in-house cutting to maintain control.
Monitor and control folding pressure: Install pressure sensors or use consistent pneumatic regulators with pressure gauges. Document pressure settings for each job.
Conduct dimensional audits: Sample measure finished boxes every 30–60 minutes during production. Plot measurements on a control chart to detect drift before defects exceed tolerance.
Individual defect prevention strategies work best within a structured quality management system. Four elements support sustainable improvement:
Defect classification guide: Create visual reference boards showing acceptable vs unacceptable examples for each defect type. Train all operators and inspectors using these standards.
Root cause documentation: When defects occur, document not just the defect count but the suspected cause category (material, machine, method, environment). Patterns emerge across jobs.
First-article approval: Require operator and supervisor sign-off on first three boxes of each job before production release. This catches errors before they propagate through entire runs.
Regular cross-functional reviews: Monthly meetings bringing production, quality, and maintenance teams together to review defect trends, often identify improvement opportunities invisible to single departments.
According to ASTM International’s Standard Practice for Establishing Quality Management Systems for Packaging Manufacturing (ASTM D7386), facilities that implement formal defect tracking with root cause analysis reduce field failure rates by an average of 35–50% within 12 months, regardless of equipment age or automation level.
Understanding the root causes of common rigid box defects provides the foundation for targeted improvement. Whether your priority is reducing warping, eliminating corner wrinkles, or preventing delamination, the technical capabilities of your production equipment directly influence what quality levels are achievable.
Once you have identified which defects most impact your operation, comparing how different equipment designs address these failure modes becomes the logical next step.
To continue building your rigid box production expertise, the following topics complement this guide:
Implementing Statistical Process Control for Rigid Box Manufacturing
Material Selection Guide for Rigid Gift Boxes: Board Grades, Cover Stocks, and Adhesives
Preventive Maintenance Schedules for Case Making Equipment
Operator Training Programs for Consistent Box Quality
How to Conduct a Packaging Line Quality Audit

 English
 Español
 Português