You have seen the final product—a rigid gift box, a hardcover book case, a luxury wine box—and you know these items are produced by machines. But what actually happens inside a cover-making machine? How does a flat sheet of paper and a piece of greyboard become a finished, three-dimensional rigid box?
Automating cover-making machines is a process that would otherwise require skilled manual labor and hours of work per unit. The machine glues surface paper, positions the board accurately, folds the edges over, and presses everything into a finished product. Understanding how this process works helps you evaluate equipment options, troubleshoot quality issues, and communicate more effectively with suppliers.
This guide breaks down the cover making process into seven sequential steps, explaining what happens at each stage and why it matters for finished product quality.
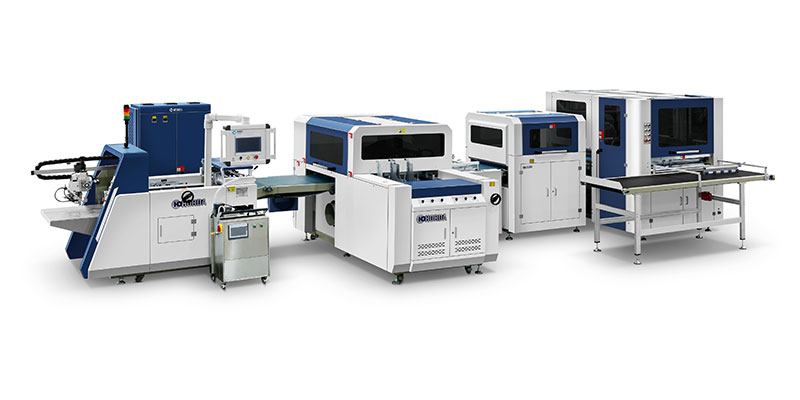
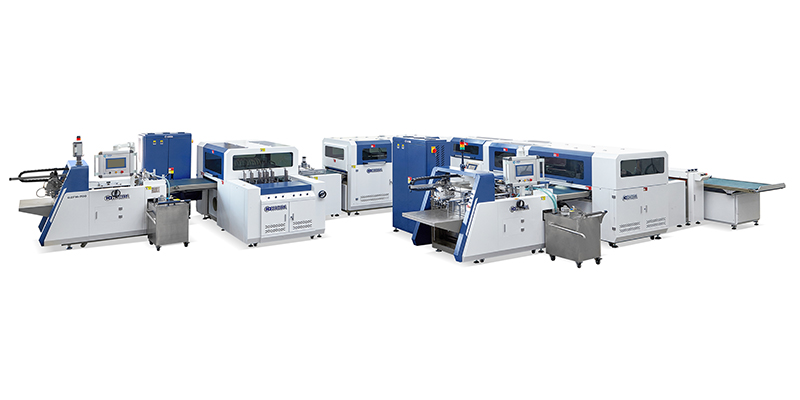
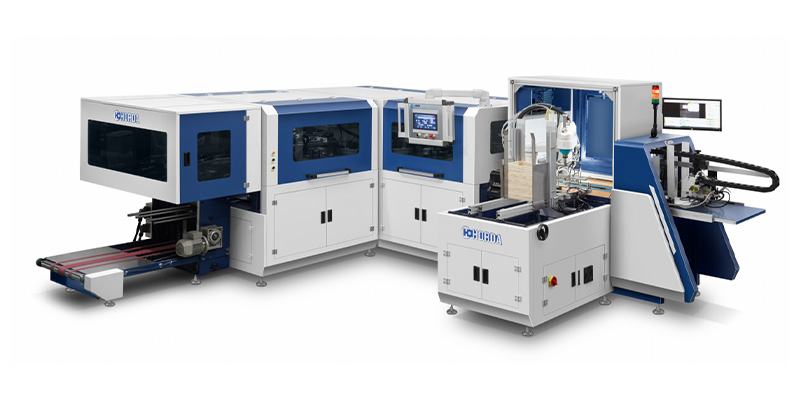
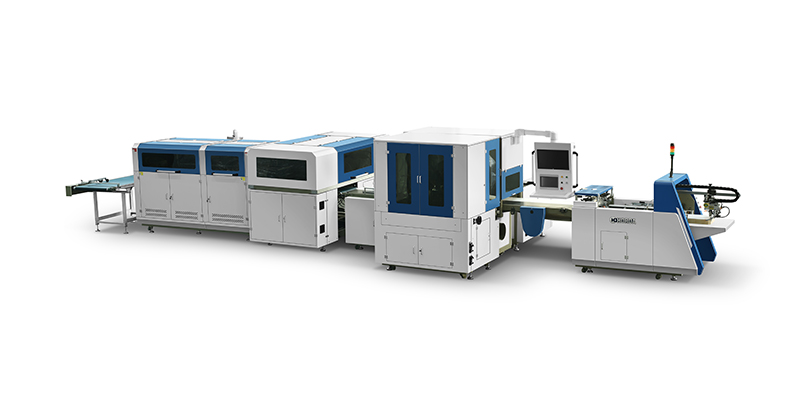
Before diving into each step, it helps to understand the overall workflow. Modern cover making machines integrate several functions into a continuous production line. According to one patent description, a fully automatic cover machine consists of three main parts: a gluing section, a cardboard positioning section, and a folding section, followed by a receiving table .
The sequence is as follows: surface paper is fed and coated with adhesive, greyboard panels are positioned precisely on the glued paper, the assembly passes through folding stations that wrap the paper over the board edges, and finally the finished product is pressed and delivered.
Each step relies on precise timing and coordination. As noted in an industry description, continuous feeding from the case feeder ensures high machine efficiency. These machines rely on precision movements, fast cycle times, and exact positioning to work effectively.
The process begins with the surface paper—the decorative material that will wrap the rigid box. In a fully automatic cover machine, the feeder typically uses a pneumatically controlled push-back paper feeding structure.
What happens: Paper is stacked on a feeding table. At the start of each cycle, the feeder head moves forward, and air-blowing nozzles on both sides of the feeder blow air between the sheets. This prevents the paper from sticking together due to static electricity or moisture.
Why it matters: Without this blowing separation, the feeder might pick up multiple sheets at once, causing jams or misalignment. The airflow ensures that only one sheet is fed into the machine at a time.
The feeder head position can be adjusted using a handle to accommodate different paper lengths. Some modern machines use a fully pneumatically controlled push-back feeding system that operates on suction nozzles.
For an overview of how these automated feeding systems integrate with other machine functions, explore the rigid box making machine specifications including automation features.
Once the surface paper is fed into the machine, it moves to the gluing section where adhesive is applied to the paper surface.
What happens: The paper passes through a glue application system that coats one side with adhesive. In many cover-making machines, this is achieved through a roller coating system where the paper passes between glue rollers. The glue layer thickness can be controlled to ensure even application.
Some machines are designed for hot melt adhesives, with glue heating systems that maintain the adhesive at the correct application temperature. For cold glue systems, the application method differs, but the principle remains the same: apply a uniform adhesive layer to the surface paper.
Why it matters: Uniform glue application is critical for preventing edge lifting and delamination. Inconsistent coverage leads to weak spots where the paper will separate from the board. As one patent description notes, the fully automatic cover machine solves problems related to manual adjustment and product quality.
What to monitor: Glue temperature (for hot melt systems), application pressure, and uniformity of coverage across the paper width.
After the paper is glued, the cardboard (greyboard) panels must be placed precisely on the glued surface. This is one of the most critical steps for quality.
What happens: The cardboard is fed from a separate feeding system onto the glued paper. In modern machines, positioning is achieved through a combination of mechanical guides, sensors, and servo-driven positioning systems.
A detailed patent description of a fully automatic cover production line explains the positioning process :
After gluing, the paper is carried forward on a conveyor belt
Sensors detect the paper's position and stop the conveyor
Positioning cylinders move to align the paper edges
A suction nozzle holds the cardboard and transfers it to the paper
The cardboard is accurately placed on the glued paper
The positioning system uses multiple sensors (X1, X2, and Y sensors) to detect paper edges and adjust the cardboard position accordingly.
Why it matters: Positioning accuracy determines whether the final box has even margins. Misalignment of even 0.5mm is visible and can cause a rejected product. Some machines achieve accuracy within ±0.1mm using CCD vision systems.
Understanding how positioning accuracy affects finished product quality is essential. Explore industry‑specific production considerations for hardcover books and file folders.
With the cardboard positioned on the glued paper, the assembly moves to a pre-pressing station.
What happens: A pressing device moves down to apply pressure to the cardboard and glued paper assembly. This initial pressure starts the bonding process. The patent description of a fully automatic cover production line notes that after positioning, the assembly is driven forward by the conveyor belt; when it moves below the pre-pressing device, the device moves down to pre-press and bond the cardboard and glued paper.
Why it matters: Pre-pressing removes air from between the paper and board, ensuring complete surface contact before the final folding and pressing steps. Without this initial bonding, the paper might shift during folding, causing wrinkles or misalignment.
This is where the cover-making machine transforms a flat sheet of paper and board into a three-dimensional wrapped structure. The folding section folds the paper edges over the board to create the finished cover.
What happens: The assembly moves through a series of folding stations that fold the paper over the board edges in sequence. As described in one patent, the folding order is typically: fold the long side first, then the remote side, and finally the front side.
In a typical machine:
Side folding: The two sides of the glued paper are folded up and over the cardboard edges
Front and rear folding: The front and rear edges are folded in sequence
The folding process relies on folding plates, rollers, and conveyor belts that guide the paper precisely.
Why it matters: The folding sequence and pressure determine whether corners are clean and edges are tight. Wrinkles, loose corners, or uneven folds result from incorrect folding parameters.
What to monitor: Folding sequence, pressure, and timing. The machine should produce clean, tight folds without wrinkles or excess material.
After folding, the wrapped cover passes through pressing rollers that finalize the bond and smooth the surface.
What happens: The assembly passes between pressure rollers that apply controlled pressure to the entire surface. According to the Paperboard Packaging Council's description of automated rigid box production, a plunger pushes the lid or base down, and the adhesive-laden wrap is rolled up and over the tray, gluing it to the sides and inside lip of the box, giving it a turned edge. Pressure is applied to the top of the unwrapped tray to help adhere the glue before the box moves into the wrapper.
Why it matters: This step ensures that the adhesive fully bonds and that the cover surface is smooth and free of wrinkles. It also sets the final dimensions and ensures the box maintains its shape.
What to monitor: Pressure consistency across the roller width. Inconsistent pressure leads to weak bonds or visible marks on the cover surface.
The final step is delivering the finished cover or box.
What happens: The completed cover is released from the machine and delivered to a receiving table or conveyor. The machine may automatically stack covers for collection. As one patent describes, the machine includes mechanisms for continuous production and product ejection.
Why it matters: Reliable ejection and stacking prevent damage to finished covers and ensure smooth downstream operations.
Throughout the process, a centralized control system coordinates all steps. Modern cover making machines use PLC (Programmable Logic Controller) systems with touchscreen interfaces. The PLC controls :
Sensor inputs for paper and board positioning
Solenoid valves for suction and air blowing functions
Motor and servo movements
Timing of each step in the sequence
As the patent notes, "the suction venting action that the plate is put in whole suction is all to control magnetic valve action by PLC to realize".
Why it matters: The control system determines how quickly the machine can run, how consistently it performs, and how easily operators can adjust settings for different products. Machines with job program storage allow quick recall of settings for repeat orders.
Understanding production process steps helps in diagnosing quality defects. For a detailed analysis of common defects and their causes, refer to our comprehensive Common Quality Defects in Rigid Box Manufacturing and Their Root Causes.
| Parameter | Typical Setting | Effect on Quality |
|---|---|---|
| Glue temperature (hot melt) | 160–180°C | Too low: poor bonding; too high: adhesive degradation |
| Glue layer thickness | 0.3–0.5mm | Too thin: edge lifting; too thick: warping |
| Production speed | 15–40 pcs/min | Higher speed requires more precise control |
| Pressing pressure | 0.3–0.5MPa | Too low: weak bond; too high: board crush |
Profile: Produces 10,000–15,000 rigid boxes daily for mid-range cosmetic brands. Product mix includes 5–8 different box sizes weekly.
Process requirements: Need fast changeover between sizes; positioning accuracy of ±0.1mm; speed of 25–30 pieces per minute. The control system should store recipes for multiple box sizes.
Profile: Produces 25,000+ rigid boxes daily for a smartphone brand. Production runs are standardized with minimal variation.
Process requirements: Speed and consistency are top priorities. Need high-speed feeding and folding systems, reliable glue application, and automated ejection. IoT connectivity for remote monitoring would be valuable for minimizing downtime.
Once you understand how cover making machines work, comparing specific equipment implementations becomes the logical next step. Not all machines offer the same feeding precision, folding accuracy, or control system capabilities. Technical specifications for glue application systems, positioning mechanisms, folding station design, and control interfaces differentiate equipment that appears similar on paper.
Troubleshooting Common Adhesion Failures in Rigid Box Lamination
How Adhesive Viscosity Affects Case Lining Quality and Consistency

 English
 Español
 Português